Melbourne, 04 June 2024 – Inner Outer Health Pty Ltd introduces an attractive, simple and more affordable workspace renting alternative for professionals. The new PAY-AS-YOU-GO offer allows professionals to service their clients in professional, inviting rooms in a prime location, paying only for what they need. For those who prefer a more stable arrangement, rental agreements are also available.
Professionals including psychologists, mediums, stretching specialists, reflexologists, reiki practitioners, naturopaths, traditional Chinese medicine practitioners, yoga, mat pilates, life coaches, counsellors, GPs, dieticians, beauty therapists, make-up artists, laser technicians, podiatrists, tutors, bookkeepers, writers, students, and remote workers can now practice their craft in a supportive business environment on an affordable hourly basis, for just $30 per hour.
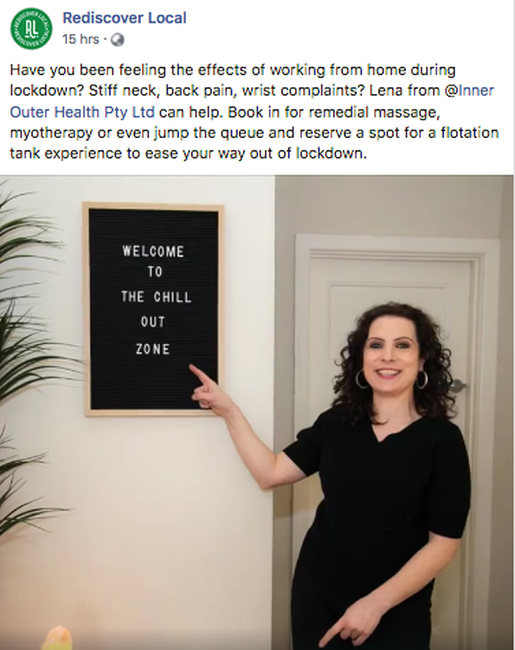
The unique offer is provided by Inner Outer Health Pty Ltd “to allow our clients to have access to other health professionals all under the one roof as a one-stop, holistic solution, saving time and energy while gaining access to a wide range of professional services,” explains Lena Yammine, the clinic’s founder and practising myotherapist.
Please note, all professionals using our workspace are required to have their own insurance and up-to-date qualifications.
“I started offering a variety of massage services from my family home back in the early 90s a couple of days a week while I was working at three different clinics,” says Yammine, “Even though I eventually wanted to start my own business, I knew I needed to gain experience from other health clinics and access their client base to develop my craft. Now, I am returning the favour to the community.”
“Very early in my career, I realised the importance of both inner and outer health and my vision has always been to create a multi-disciplinary business offering complementary therapies that allow my clients to reach their ultimate state of mental, emotional and physical health,” explains Yammine.
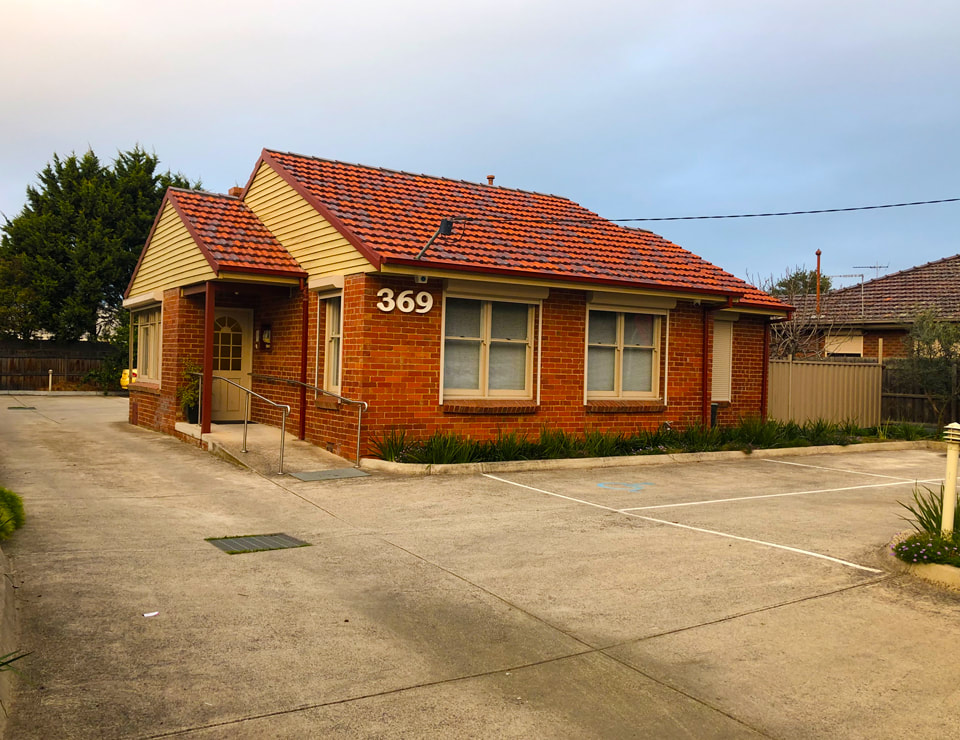
Professionals who secure a room will gain access to the clinic, protected with high-fidelity security cameras, rooms with comfortable seating and roller shutters for privacy, modern air-conditioning/heating, a fully equipped kitchen and pantry, a back courtyard, separate bathrooms for clients and staff, free Wi-Fi, stylish desks, and electric athlegen massage tables if needed. The location also offers convenient walking access to shops like Bunnings, Aldi, Chemist Warehouse, and Officeworks, a local park, and easy access to public transportation, including a bus stop on its doorstep and a train station just a 20-minute walk away. Plus, there’s ample free onsite parking for staff and clients.
“The workspaces are offered on a PAY-AS-YOU-GO or a monthly rental basis for a minimum of one year,” says Yammine. Our offer is designed to support professionals to practice out of an established location without having to outlay a large investment or enter into a long contractual agreement.”
This offer is ideal for experienced professionals looking to relocate or expand their business as well as new health professionals going out on their own. For more information, visit Inner Outer Health Workspace Rental 2024.
Professionals including psychologists, mediums, stretching specialists, reflexologists, reiki practitioners, naturopaths, traditional Chinese medicine practitioners, yoga, mat pilates, life coaches, counsellors, GPs, dieticians, beauty therapists, make-up artists, laser technicians, podiatrists, tutors, bookkeepers, writers, students, and remote workers can now practice their craft in a supportive business environment on an affordable hourly basis, for just $30 per hour.
The unique offer is provided by Inner Outer Health Pty Ltd “to allow our clients to have access to other health professionals all under the one roof as a one-stop, holistic solution, saving time and energy while gaining access to a wide range of professional services,” explains Lena Yammine, the clinic’s founder and practising myotherapist.
Please note, all professionals using our workspace are required to have their own insurance and up-to-date qualifications.
“I started offering a variety of massage services from my family home back in the early 90s a couple of days a week while I was working at three different clinics,” says Yammine, “Even though I eventually wanted to start my own business, I knew I needed to gain experience from other health clinics and access their client base to develop my craft. Now, I am returning the favour to the community.”
“Very early in my career, I realised the importance of both inner and outer health and my vision has always been to create a multi-disciplinary business offering complementary therapies that allow my clients to reach their ultimate state of mental, emotional and physical health,” explains Yammine.
Professionals who secure a room will gain access to the clinic, protected with high-fidelity security cameras, rooms with comfortable seating and roller shutters for privacy, modern air-conditioning/heating, a fully equipped kitchen and pantry, a back courtyard, separate bathrooms for clients and staff, free Wi-Fi, stylish desks, and electric athlegen massage tables if needed. The location also offers convenient walking access to shops like Bunnings, Aldi, Chemist Warehouse, and Officeworks, a local park, and easy access to public transportation, including a bus stop on its doorstep and a train station just a 20-minute walk away. Plus, there’s ample free onsite parking for staff and clients.
“The workspaces are offered on a PAY-AS-YOU-GO or a monthly rental basis for a minimum of one year,” says Yammine. Our offer is designed to support professionals to practice out of an established location without having to outlay a large investment or enter into a long contractual agreement.”
This offer is ideal for experienced professionals looking to relocate or expand their business as well as new health professionals going out on their own. For more information, visit Inner Outer Health Workspace Rental 2024.

Inner Outer Health Workspace
Inner Outer Health Pty Ltd
Inner Outer Health Pty Ltd, offers a comprehensive range of health and wellness services designed to promote both inner and outer well-being. The clinic provides a holistic environment where clients can access a variety of therapeutic services in one convenient location.
Lena Yammine is the Founder and Managing Director of Inner Outer Health Pty Ltd and Floatation Tank Melbourne. She holds an Advanced Diploma of Myotherapy from RMIT (2001) and is a Practitioner of Neuro-Linguistic Programming (NLP). With over eleven years of experience as a health and fitness instructor, Lena has expertise in gymnasium work, circuit training, personal training, group exercise, and aqua exercise instruction. Additionally, Lena is a pillow and sleep consultant at the clinic.
Lena has been practising as a myotherapist for 23 years. This is her passion and her purpose in life. As a myotherapist, Lena also offers relaxation massage, floatation therapy, and pillow and sleep consultation services at the clinic. Lena is dedicated to improving her clients' health by helping them maximise mobility by treating muscular injuries, aches, and pains. She works with her clients to understand the underlying causes of their conditions and develops strategies to aid in recovery and prevent recurrence. Her approach emphasises the importance of addressing both symptoms and their root causes, advocating for lifestyle changes that support long-term health.
Lena is a member of the Myotherapy Association Australia.
To learn more about Lena Yammine's story, visit her blog.
Contact details:
Lena Yammine
Email: [email protected]
Phone: 03 9440 9453
Website:
https://www.innerouterhealth.com.au/
https://www.floatationtankmelbourne.com.au/
LinkedIn:
https://au.linkedin.com/in/lena-yammine-871bab14
Facebook:
https://www.facebook.com/innerouterhealthmelbourne/?ref=tn_tnmn
https://www.facebook.com/floatmelbourne/
Instagram:
https://www.instagram.com/inner_outer_health/?fbclid=IwAR0untAKCvv9kfKcnkzaYRx3jlp28-RS2B0TBZJYk5aoDRtAvOYsbibKQJY
https://www.instagram.com/floatationtankmelbourne/?fbclid=IwAR3JwQzZriL6wEuiYmFSUZPqfCckcy-jWRxi9nBU9AvXvlSpDVlc_1TDKhg


 RSS Feed